Okteto 是一个神奇的工具,可以方便我们快速构建开发环境!
Okteto 是一个通过在 Kubernetes 中来开发和测试代码的应用程序开发工具,可以通过 Okteto 在 Kubernetes 中一键为我们启动一个开发环境,非常简单方便。

1. Okteto 命令工具安装
Okteto为Kubernetes应用程序提供了本地开发环境的体验,你可以在你的IDE中进行代码编辑,然后Okteto会自动将它同步到你的集群上面,验证对应功能。Okteto CLI是开源的,代码可在Github上获得,它适用于任何Kubernetes集群的客户端工具。
# MacOS/Linux
$ brew install okteto
$ curl https://get.okteto.com -sSfL | sh

# Windows
$ scoop install okteto

# Github
https://github.com/okteto/okteto/releases
2. Okteto 命令工具使用
| 编号 | 参数 | 对应使用含义 | 后缀参数 |
|---|---|---|---|
| 1 | okteto login [URL] |
登录到服务并下载令牌和证书 | --token |
| 2 | okteto init |
自动生成 Okteto 清单文件等 | --file |
| 3 | okteto up |
激活开发容器 | |
| 4 | okteto down |
停用开发容器并恢复之前的配置 | --file/--namespace/--context |
| 5 | okteto exec COMMAND |
在开发容器中执行执行命令 | --file/--namespace/--context |
| 6 | okteto build [PATH] |
从 Dockerfile 中打包镜像 | --file/--tag/--no-cache |
| 7 | okteto status --info |
文件同步进程状态 | --file/--namespace/--watch |
| 8 | okteto restart |
重新启动服务 | --file/--namespace/--context |
| 9 | okteto push |
推送并重新部署到 Okteto 中 | --file/--namespace/--tag |
| 10 | okteto doctor |
检查环境并生成诊断日志 | - |
| 11 | okteto analytics [parameters] |
启用/禁用分析数据收集 | --disable |
| 12 | okteto namespace [namespace] |
下载名称空间的 k8s 凭据 | |
| 13 | okteto pipeline [command] |
管道管理命令 | - |
| 14 | okteto pipeline deploy |
部署管道服务 | --name/--namespace/--repository |
| 15 | okteto pipeline destroy |
删除管道服务 | --name/--namespace/--volumes |
| 16 | okteto stack [command] |
堆栈管理命令 | - |
| 17 | okteto stack deploy |
部署堆栈服务 | --file/--namespace/--context |
| 18 | okteto stack destroy |
删除堆栈服务 | --file/--namespace/--context |
| 19 | okteto version |
显示当前安装的版本 | - |
| 20 | okteto help |
显示完整的帮助 | - |
# format
$ okteto [options] <command> <subcommand> [parameters]

# analytics
➜ okteto analytics
 ✓  Analytics have been enabled

# status
$ okteto status --info
 i  Local syncthing url: http://localhost:60539
 i  Remote syncthing url: http://localhost:60538
 i  Syncthing username: okteto
 i  Syncthing password: ac0ee34a-b1aa-4a41-bc67-cec3128b6cfd
 ✓  Synchronization status: 100.00%
3. Okteto 启动配置文件
- 生成的
okteto.yml是描述开发容器的一种清单格式,它声明了部署目标、开发容器、要同步的文件夹以及激活开发容器所需的其他信息。
name: vote
labels:
  app.kubernetes.io/part-of: vote
  app.kubernetes.io/component: api
image: python:3
command: ["python", "app.py"]
workdir: /usr/src/app
sync:
  - .:/usr/src/app
environment:
  - name=$USER
  - environment=development
resources:
  requests:
    memory: "64Mi"
    cpu: "250m"
  limits:
    memory: "128Mi"
    cpu: "500m"
forward:
  - 8080:80
  - 5432:postgres:5432
reverse:
  - 9000:9001
securityContext:
  runAsUser: 1000
  runAsGroup: 2000
  fsGroup: 3000
  capabilities:
    add:
      - SYS_PTRACE
4. Okteto 部署配置文件
Okteto Stacks 适合那些不想处理 Kubernetes 清单的复杂性的开发人员,其实现并扩展了 Compose 规范,使在 Kubernetes 中部署容器变得容易。
.stignore-> 同步需要忽略文件列表okteto.yml-> 服务启动生成的配置文件
namespace: development

services:
  vote:
    name: voting-app
    build: vote
    scale: 2
    ports:
      - 8080:8080
    environment:
      - ROOT_PASSWORD=${PASSWORD}

  redis:
    name: voting-redis
    image: redis
    ports:
      - 6379
    volumes:
      - redis:/data

volumes:
  redis:

forward:
  - 8080:8080

deploy:
  resources:
    reservations:
      cpu: 300m
      memory: 500Mi
    limits:
      cpu: 500m
      memory: 800Mi
  restart_policy:
    condition: on-failure
    max_attempts: 3
# default .stignore for a go-based project
okteto.yml
.git
*.exe
*.exe~
*.dll
*.so
*.dylib

# Test binary, built with go test -c
*.test

# Output of the go coverage tool, specifically when used with LiteIDE
*.out
5. Okteto 远程部署服务
作为启用开发容器的一部分,okteto up 执行以下步骤:
- 一个极简
SSH服务器被注入到您的开发容器中 - 从开发容器的本地端口创建端口转发到
22端口 - 主机条目将添加到你的本地
.ssh/config文件中,其值如下:
Host MANIFEST_NAME.okteto
  HostName localhost
  Port PORT
  StrictHostKeyChecking no
  UserKnownHostsFile /dev/null
okteto up 使用 SSH 服务器来运行远程命令并将端口转发到你的开发容器,SSH 服务器可以将你的开发容器与支持远程开发的 IDE 集成,例如 VS Code 或 PyCharm。
- 使用 SSH 连接
# 开发容器启动并运行
$ ssh -P PORT localhost

# 还可以使用添加到本地SSH配置中的主机条目进行SSH
$ ssh MANIFEST_NAME.okteto
- 安全巩固
# 第一次运行时,将创建SSH秘钥对
# $HOME/.okteto/id_rsa_okteto
# $HOME/.okteto/id_rsa_okteto.pub
$ okteto up
6. Okteto 的云服务使用
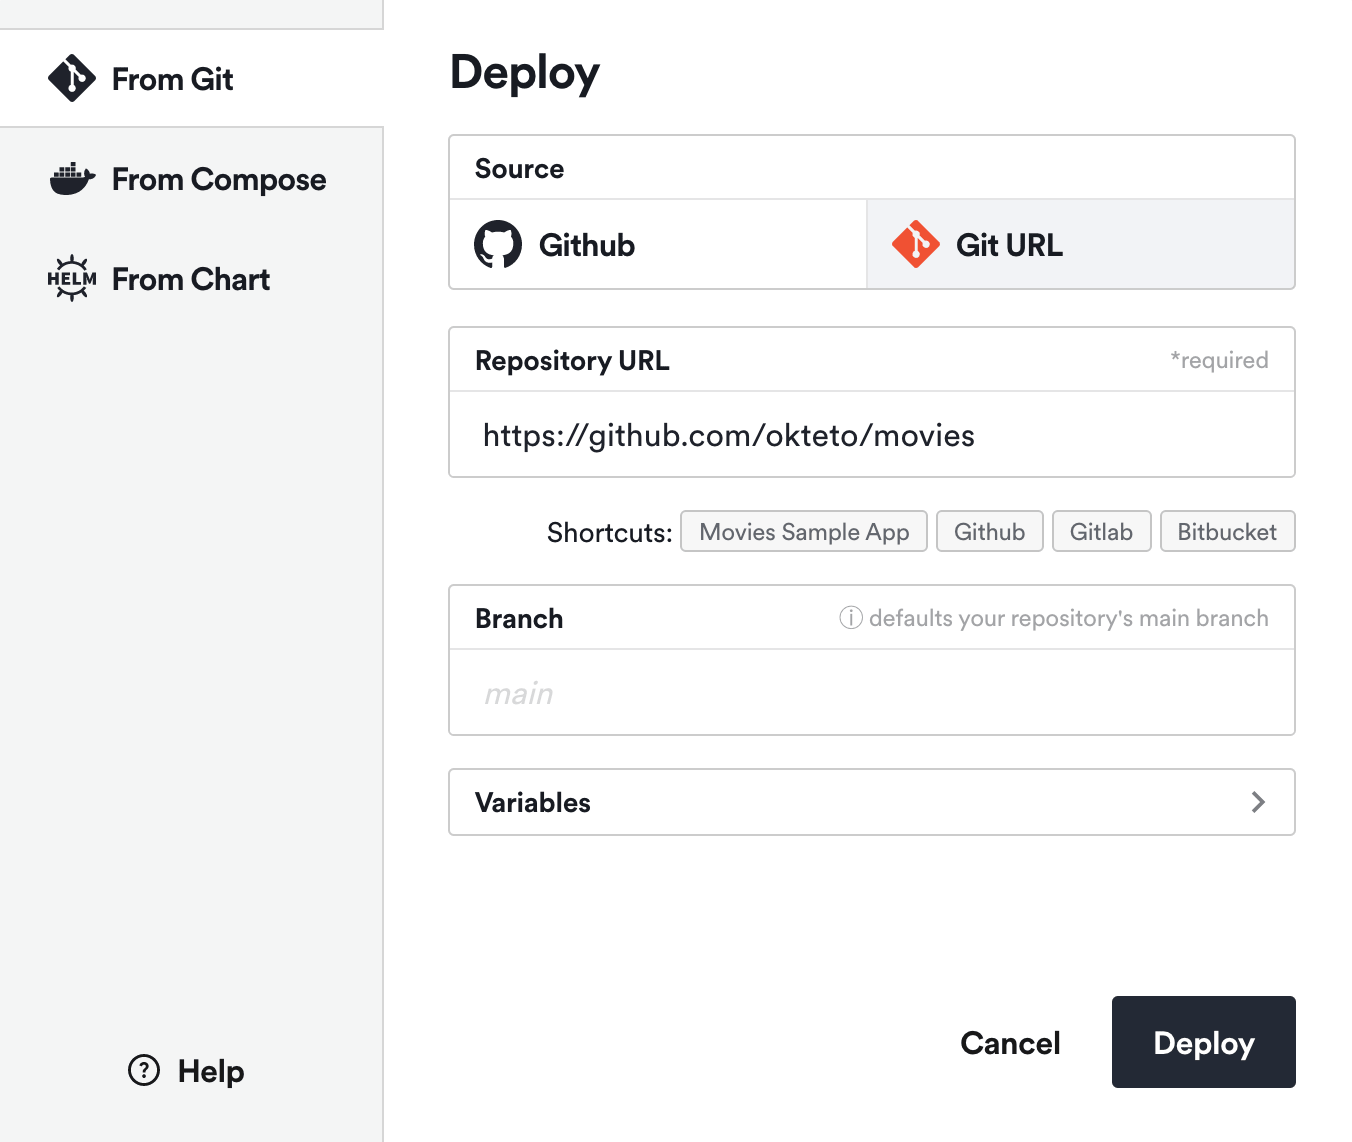
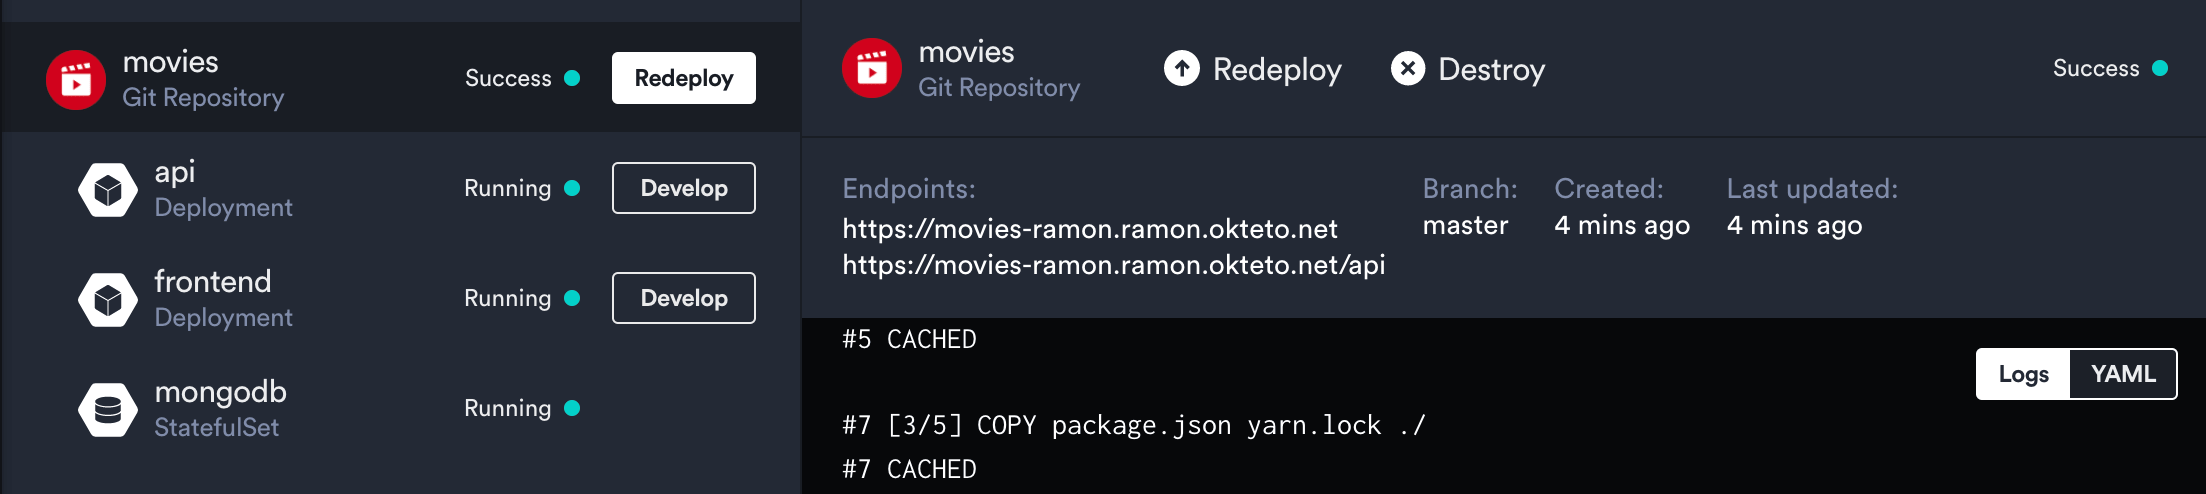
Okteto Cloud 提供了对安全的 Kubernetes 名称空间的即时访问,使开发人员能够完全在云中编写、构建和运行 Kubernetes 应用程序。
- Step 1: Deploy the Movies App
- Step 2: Install the Okteto CLI
# MacOS/Linux
$ brew install okteto
$ curl https://get.okteto.com -sSfL | sh
- Step 3: Configure access to your Okteto Cloud namespace
$ okteto namespace
Authentication required. Do you want to log into Okteto? [y/n]: y
What is the URL of your Okteto instance? [https://cloud.okteto.com]:
Authentication will continue in your default browser
 ✓  Logged in as cindy
 ✓  Updated context 'cloud_okteto_com' in '/Users/cindy/.kube/config'
- Step 4: Activate your development container
# clone
$ git clone https://github.com/okteto/movies
$ cd movies

# api component
$ cd api
$ okteto up
 ✓  Persistent volume successfully attached
 ✓  Images successfully pulled
 ✓  Files synchronized
    Namespace: cindy
    Name:      api
    Forward:   8080 -> 8080
               9229 -> 9229
Welcome to your development container. Happy coding!
cindy:api src>

cindy:api src> env | grep MONGODB_PASSWORD
MONGODB_PASSWORD=Password!1@2

cindy:api src> yarn start
yarn run v1.19.1
$ nodemon server.js
[nodemon] 1.19.2
[nodemon] to restart at any time, enter `rs`
[nodemon] watching dir(s): *.*
[nodemon] starting `node server.js`
Server running on port 8080.
GET /api/movies
GET /api/watching
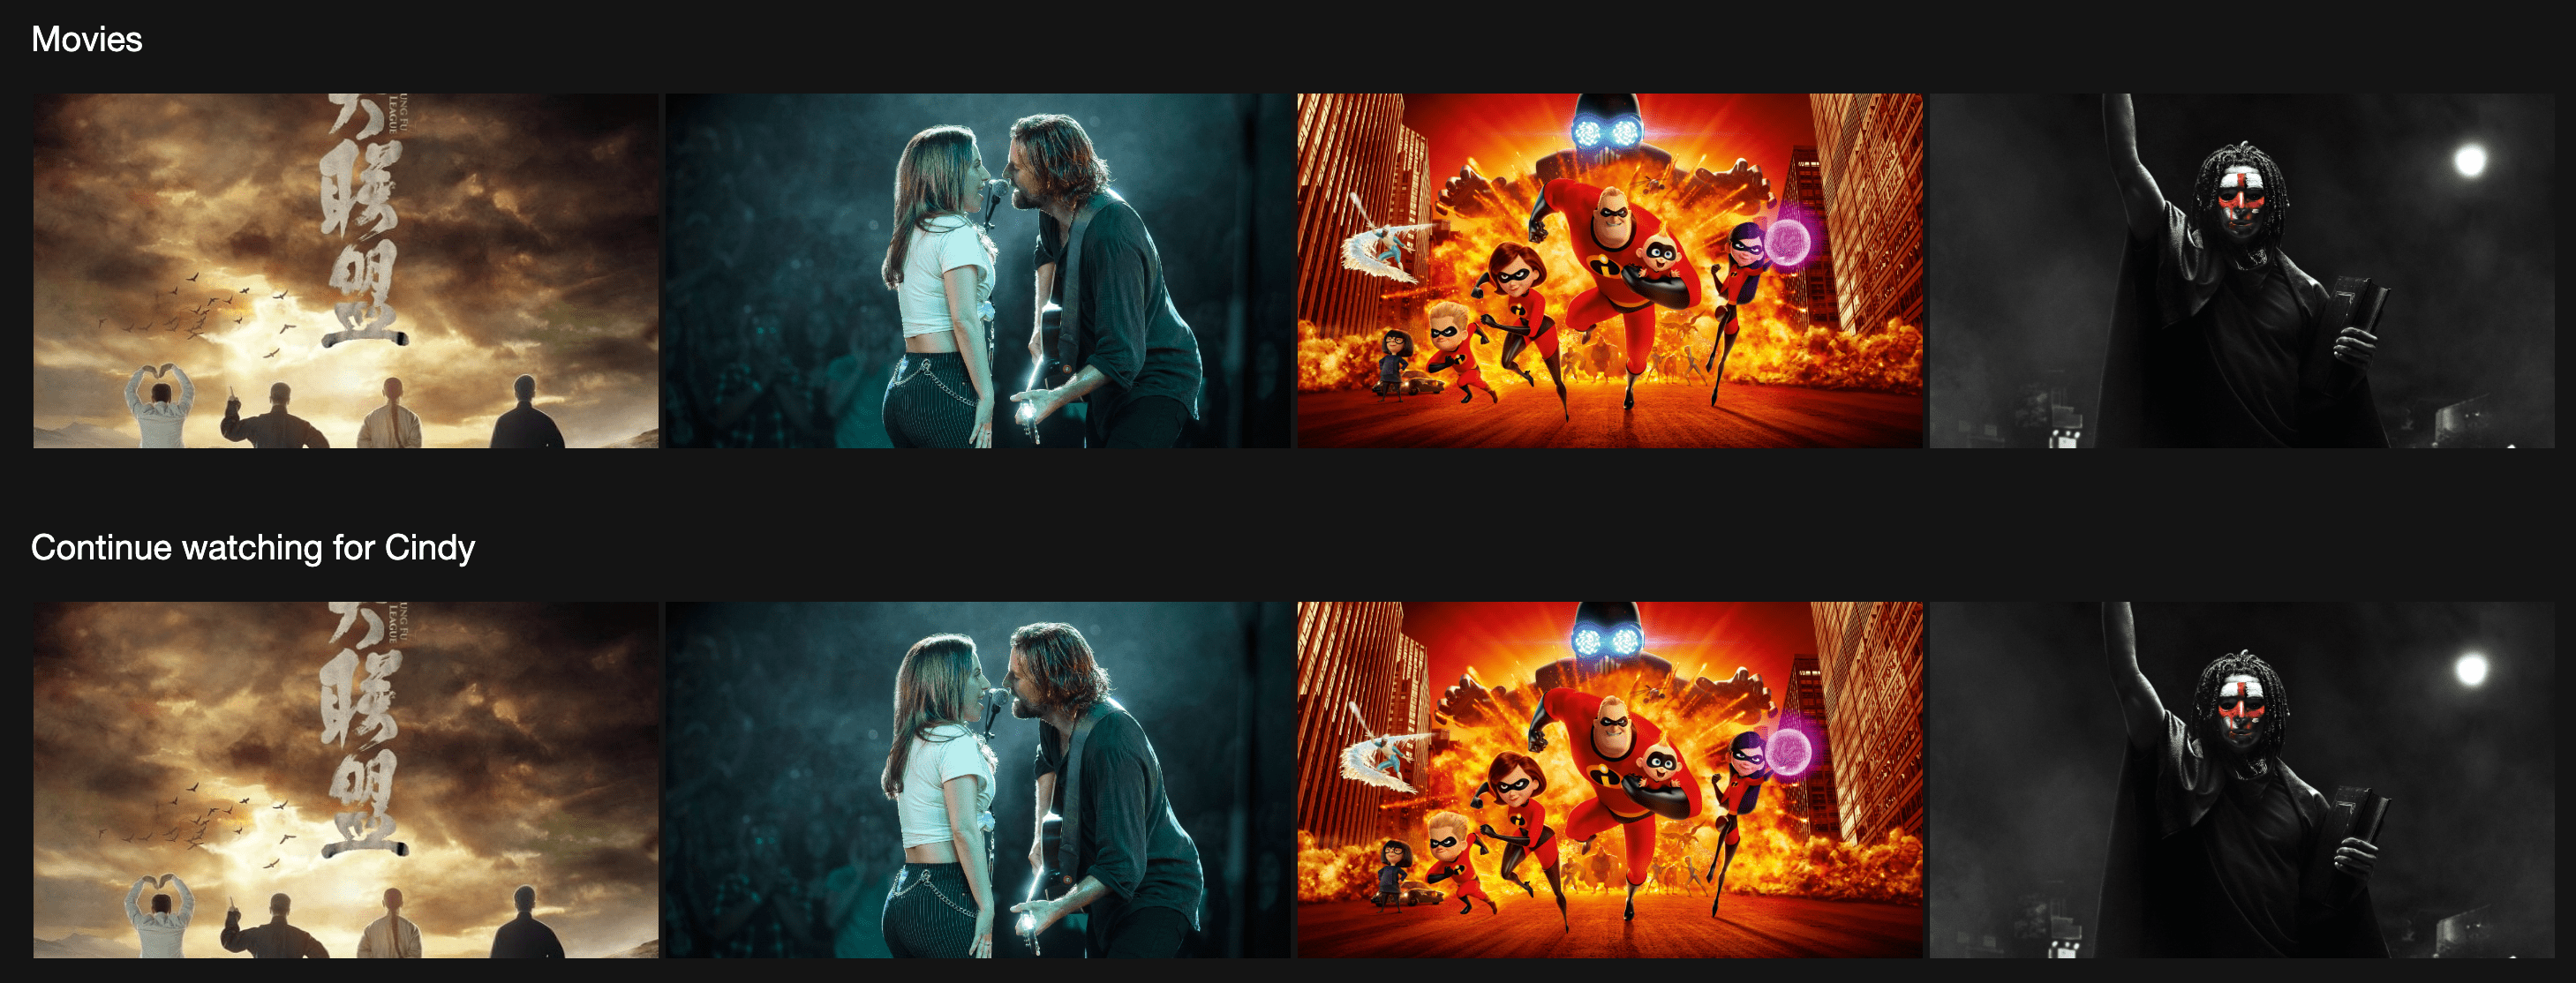
- Step 5: Development time!
# server.js
db.collection('watching').find().toArray( (err, results) =>{

# info
[nodemon] restarting due to changes...
[nodemon] starting `node server.js`
Server running on port 8080.
7. okteto 与 github 集成
将展示如何使用 Okteto Cloud 和 Github Actions 为你的应用程序自动创建一个预览环境。
- Step 1: Fork the Repository
# clone
https://github.com/okteto/kubernetes-preview-environment
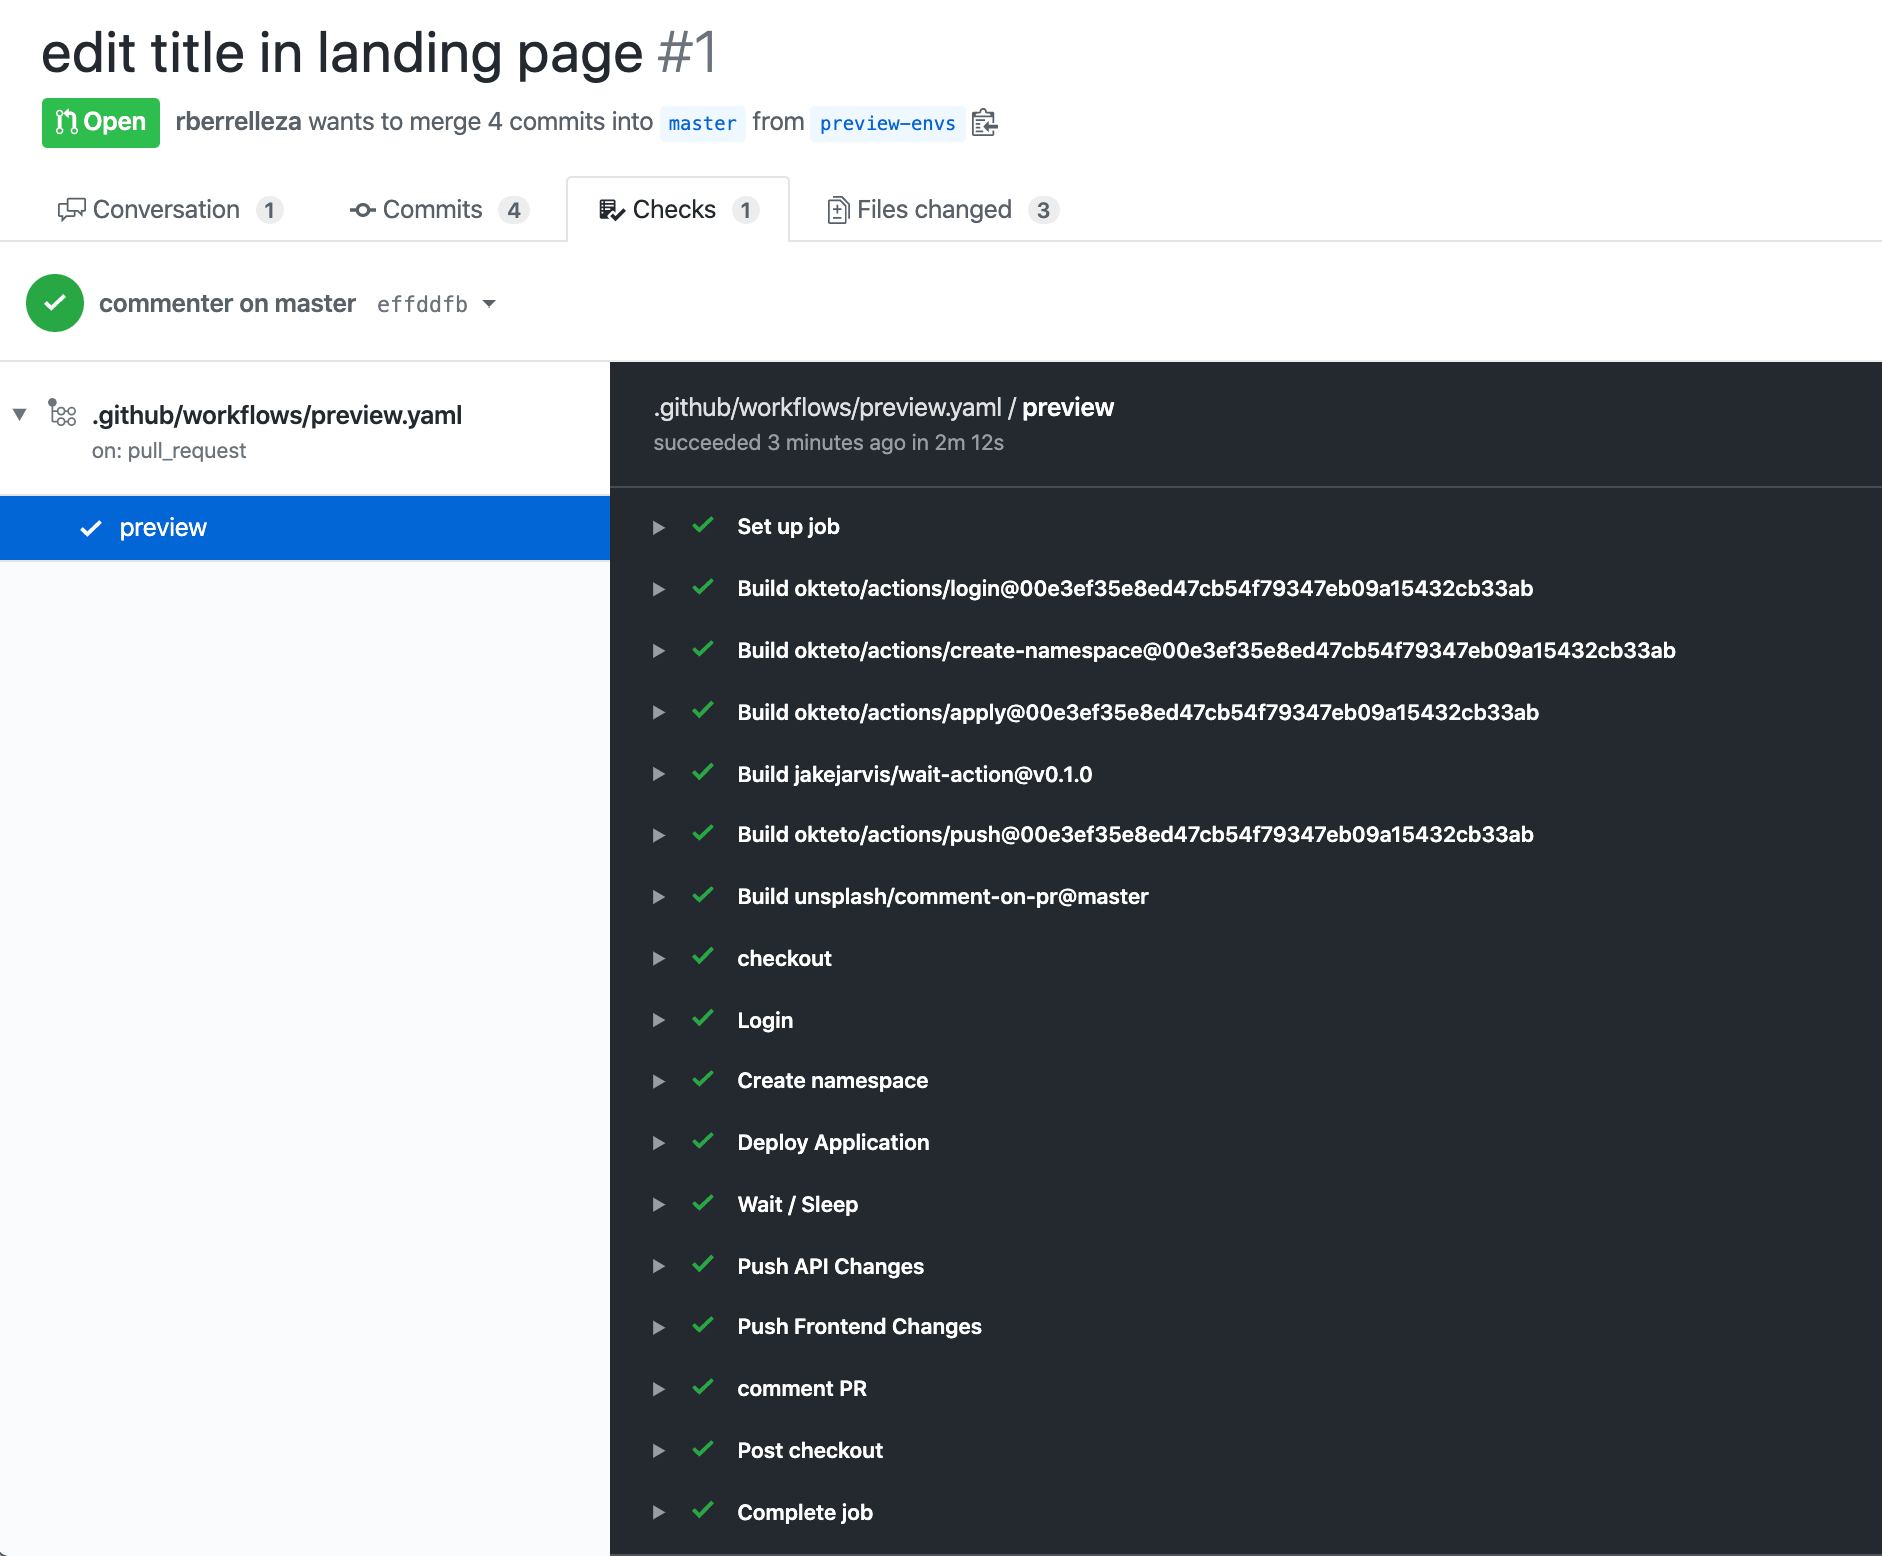
- Step 2: Create the Github Workflow
- Log into Okteto Cloud.
- Deploy a preview environment in Okteto Cloud.
- Update the PR with the URL of the preview environment.
# action
https://github.com/okteto/actions
# file: .github/workflows/preview.yaml
on:
  pull_request:
    branches:
      - master

jobs:
  preview:
    runs-on: ubuntu-latest
    steps:
      - name: Login
        uses: okteto/login@master
        with:
          token: ${{ secrets.OKTETO_TOKEN }}

      - name: Deploy preview environment
        uses: okteto/deploy-preview@master
        env:
          GITHUB_TOKEN: ${{ secrets.GITHUB_TOKEN }}
        with:
          name: pr-${{ github.event.number }}-cindylopez
          scope: personal
          timeout: 15m
- Step 3: Configure your Okteto API Token
# secrets
OKTETO_TOKEN

# create a personal access token
https://okteto.com/docs/cloud/personal-access-tokens
- Step 4: Open a Pull Request
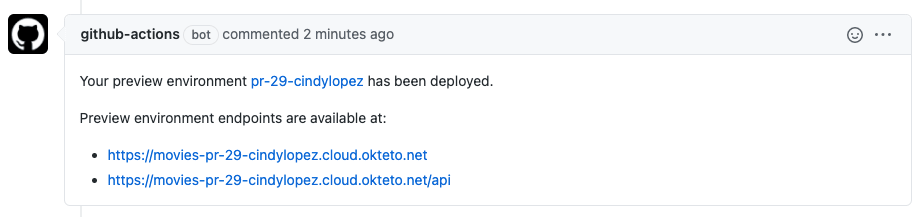
- Step 5: See your changes live
- Step 6: Cleanup
# file: .github/workflows/preview-closed.yaml
on:
  pull_request:
    types:
      - closed

jobs:
  closed:
    runs-on: ubuntu-latest
    steps:
      - name: checkout
        uses: actions/checkout@master

      - name: Login
        uses: okteto/login@master
        with:
          token: ${{ secrets.OKTETO_TOKEN }}

      - name: Delete preview environment
        uses: okteto/destroy-preview@master
        with:
          name: pr-${{ github.event.number }}-cindylopez
8. okteto 本地开发环境
- Step 1: Deploy the Python Sample App
# clone
$ git clone https://github.com/okteto/python-getting-started
$ cd python-getting-started

# deployment
$ kubectl apply -f k8s.yml
deployment.apps "hello-world" created
service "hello-world" created
- Step 2: Create your okteto manifest
# 初始化配置
$ okteto init
This command walks you through creating an okteto manifest.
It only covers the most common items, and tries to guess sensible defaults.
See https://okteto.com/docs/reference/manifest for the official documentation about the okteto manifest.
Use the arrow keys to navigate: ↓ ↑ → ←
Select the deployment you want to develop:
  ▸ hello-world
    Use default values
 ✓  hello-world
 ✓  Deployment 'hello-world' successfully analyzed
 ✓  okteto manifest (okteto.yml) created
 i  Run 'okteto up' to activate your development container
# 配置文件
$ cat okteto.yml
name: hello-world
command: bash
volumes:
  - /root/.cache/pip
sync:
  - .:/usr/src/app
forward:
  - 8080:8080
reverse:
  - 9000:9000
- Step 3: Activate your development container
$ okteto up
 ✓  Persistent volume successfully attached
 ✓  Images successfully pulled
 ✓  Files synchronized
    Namespace: cindy
    Name:      hello-world
    Forward:   8080 -> 8080
    Reverse:   9000 <- 9000

Welcome to your development container. Happy coding!
cindy:hello-world app>

cindy:hello-world app> python app.py
Starting hello-world server...
 * Serving Flask app "app" (lazy loading)
 * Environment: development
 * Debug mode: on
 * Running on http://0.0.0.0:8080/ (Press CTRL+C to quit)
- Step 4: Develop directly on Okteto Cloud
# code
$ cat app.py
@app.route('/')
def hello_world():
    return 'Hello World from the cluster!'
}

# logging
 * Detected change in '/usr/src/app/app.py', reloading
 * Restarting with stat
Starting hello-world server...
 * Debugger is active!
 * Debugger PIN: 308-916-374
- Step 5: Debug directly in Okteto Cloud
# code
$ cat app.py
if __name__ == '__main__':
  print('Starting hello-world server...')
  # comment out to use Pycharm's remote debugger
  attach()

  app.run(host='0.0.0.0', port=8080)

# logging
Starting hello-world server...
 * Serving Flask app "app" (lazy loading)
 * Environment: development
 * Debug mode: on
 * Running on http://0.0.0.0:8080/ (Press CTRL+C to quit)
 * Restarting with stat
Starting hello-world server...
Connecting to debugger...
9. okteto 参考链接地址
送人玫瑰,手有余香!