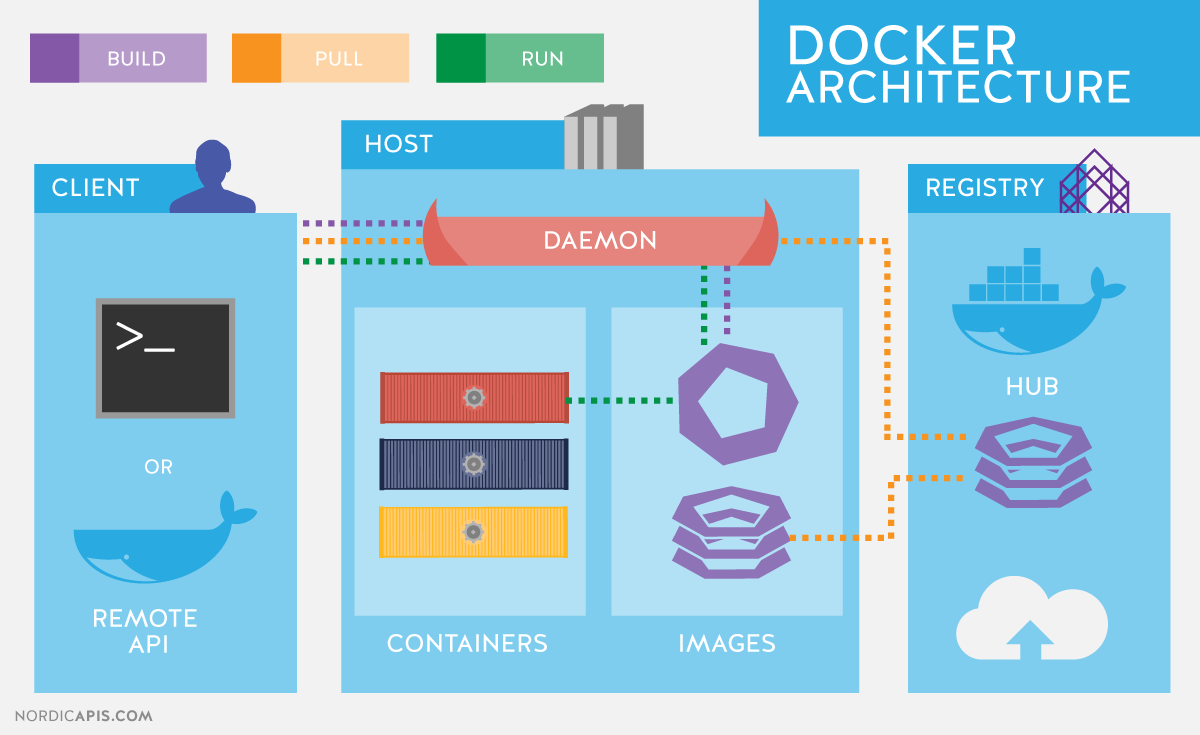
虽然通常我们都是使用网络来安装
docker的,但是对于安全要求比较高的业务或者用户来说,部署产品需要在内网部署,而内网通常是无法访问外部网络的,所以就需要通过内网进行安装了。

1. yum 离线安装包获取方法
下载软件包
- 这里以
CentOS7为例进行说明
# 替换并更新软件源
$ curl -o /etc/yum.repos.d/CentOS-Base.repo http://mirrors.aliyun.com/repo/Centos-7.repo

# 生成缓存
$ yum makecache
# 添加docker-ce软件源
$ curl -o /etc/yum.repos.d/docker-ce.repo https://download.docker.com/linux/centos/docker-ce.repo

生成缓存
$ yum makecache
# 前提条件
$ yum install -y yum-plugin-downloadonly

# 下载rpm安装包,我这里以docker-ce为例说明
$ yum install --downloadonly --downloaddir=./ docker-ce
- 这里以
Ubuntu18.04为例进行说明
# 会存放在/var/cache/apt/archives目录下面
$ sudo apt-get install --download-only pppoe
2. yum 离线安装 docker-ce 工具
安装软件包
- 如果我们发现原有的操作系统已经安装了
docker工具,但是对应版本并不能满足我们的需要,可以将其卸载之后再次安装即可。
# 搜索已经安装的docker安装包
$ sudo yum list installed | grep docker
docker.x86_64 2:1.12.6-16.el7.centos @extras

# 分别删除安装包
$ sudo yum –y remove docker.x86_64
- 使用我们打好的
docker-ce的安装包,执行安装命令的时候报错。
# 安装时一并安装对应依赖
$ sudo yum install ./*.rpm
--> Finished Dependency Resolution
Error: Package: audit-libs-python-2.8.1-3.el7.x86_64 (/audit-libs-python-2.8.1-3.el7.x86_64)
 Requires: audit-libs(x86-64) = 2.8.1-3.el7
 Installed: audit-libs-2.8.1-3.el7_5.1.x86_64 (@updates)
 audit-libs(x86-64) = 2.8.1-3.el7_5.1
 Available: audit-libs-2.8.1-3.el7.x86_64 (base)
 audit-libs(x86-64) = 2.8.1-3.el7
You could try using --skip-broken to work around the problem
You could try running: rpm -Va --nofiles --nodigest

# 安装的时候忽略以问题
$ rpm -ivh --force --nodeps ./*.rpm
- 可以发现可能为系统已经安装了对应的包,将其移出目录外之后再次安装。
# 移动到上级目录
$ mv audit-libs-2.8.1-3.el7.x86_64.rpm ..
$ mv audit-libs-python-2.8.1-3.el7.x86_64.rpm ..
- 如果有缺少依赖的问题,就到下面网站中找对应缺失的相关依赖镜像。
# CentOS
https://centos.pkgs.org/
- 总结下:虽然操作系统的大版本是一致的,但是对应小版本不一致可能会存在对应
rpm包小版本的不一致,而导致存在依赖问题,导致安装时失败。
3. pip 离线安装包获取方法
下载软件包
Python环境安装package的方法,一般是采用pip命令在线从PyPI网站上面下载安装的,这也是最为方便的途径。但是在某些情况下,要为一台离线的机器安装package依赖包,其根本无法访问外网环境。当然,一般大厂都会有内网PyPI代理,只要改一下--index-url参数即可。若无代理的情况下,只能将所有依赖到的package离线下载下来,放到离线的机器上安装,即可。由于手动下载所有依赖是一件非常痛苦的事情,所以我发现了
pip download命令可以很好的解决这个问题。
# (1)确认需要的依赖包 - 外部第三方库
$ sudo vim requirements.txt
alembic

# (2)确认需要的依赖包 - 内部第三方库
$ sudo vim requirements.txt
--index-url https://admin:[email protected]:4874/simple
love_grilfriend

# (3)通过如下命令下载依赖
$ sudo pip download -d /root/packages -r requirements.txt
4. pip 离线安装 package 方法
需要注意的是,存在
online和offline机器架构完全相同,也可能架构不相同。
- [1] 架构相同
# 直接在online机器执行如下命令下载所有依赖package到当前目录
$ sudo pip download tensorflow

# 将目录内容拷贝到目标offline机器并目标offline机器执行
$ pip install --no-index --find-links=file:/data/tensorflow_package_dir tensorflow

# 不依赖其他库强制安装
$ pip install --no-deps tensorflow-1.2.3-cp36-cp36m-linux_x86_64.whl
- [2] 架构不同
# pyenv+docker
# 架构不同的情况下,可以使用docker创建一个和目标机器相同的系统
# 然后,使用上面这中方式进行下载和安装就可以了,也是很简单的,哈哈

# pyenv
# 通过pyenv安装指定版本的python
$ curl -L https://github.com/pyenv/pyenv-installer/raw/master/bin/pyenv-installer | bash pyenv install 3.7.13
# 切换Python版本
$ pyenv global 2.7.13

# docker
# 先启动目标系统的docker镜像
$ docker run -it -v /offline_tensorflow_py3:/package ubuntu /bin/bash
# 在容器内安装python
$ apt-get update && apt-get install python python-pip
# 使用和相同架构的操作步骤
- [3] 存在问题 - 导致下文
pip download失败的原因
PyPI 上 package 有好几种格式,不幸的是 PiPY 并没有规定一个 package 必须提供的安装格式,有的只有 wheel 没有源文件,有的只有源文件没有 wheel 或 egg。
- 源文件(一般是.tar.gz 或.zip 文件,用 pip 安装,与机器架构无关,但某些 package 可能涉及到 C/C++编译)
- wheel 文件(二进制文件,拓展名为.whl,用 pip 安装,无需编译,但与机器架构相关)
- .egg 文件(二进制文件,用 easy_install 安装,无需编译,但与机器架构相关)
# 只要指定--platform/--python-version/--implementation/--abi即可
pip download with the --platform, --python-version, --implementation, and --abi options provides the ability to fetch dependencies for an interpreter and system other than the ones that pip is running on.

--only-binary=:all: or --no-deps is required when using any of these options. It is important to note that these options all default to the current system/interpreter, and not to the most restrictive constraints (e.g. platform any, abi none, etc).

To avoid fetching dependencies that happen to match the constraint of the current interpreter (but not your target one), it is recommended to specify all of these options if you are specifying one of them. Generic dependencies (e.g. universal wheels, or dependencies with no platform, abi, or implementation constraints) will still match an over- constrained download requirement.
# 下载TensorFlow的pip包
pip download \
    --only-binary=:all: \        # 只下载二进制package(即wheel或egg)
    --platform linux_x86_64 \    # 说明是linux 64位架构
    --python-version 27 \        # Python 2.7
    --implementation cp \        # Cython 一般都是这个
    --abi cp27mu                 # 解释器和系统的依赖关系的能力
    tensorflow                   # 要下载的package名
5. 离线升级 Linux 内核的方法
这里主要是已 CentOS 的操作系统进行演示说明
- [1] 事件起因
在 CentOS7.3 的系统上面部署 NFS 服务的时候,发现跨主机使用的话,需要开通多个端口才能保证正常的使用。但是,我之前在 Ubuntu18.04 的系统上使用 NFS 服务却只需要使用到默认的一个端口即可,这个端口就是 2049 了。看了 NFS 服务的版本号也是相同的,一直没有找到问题的原因,最后还是我的 leader 发现是因为 Linux 操作系统的版本不一致导致的。
我们安装 CentOS7.3 的裸机,系统默认的内核版本为 3.10,属于比较老的版本,导致部分功能无法使用。现在,最新稳定的系统内核为 4.12 版本,所以需要将我们现在的系统内核版本升级到最新的版本,即可解决上述问题。
- [2] 升级准备
# 备份重要数据
如果是虚拟机的话,使用快照进行备份
针对重要程序数据进行备份,例如 MySQL、Apache、Nginx等

# 检查当前CentOS系统版本
$ cat /etc/redhat-release
> CentOS Linux release 7.3.1611 (Core)

# 检查当前CentOS系统内核版本
# 版本性质: 主分支ml(mainline),稳定版(stable),长期维护版lt(longterm)
$ uname -r
> 3.10.0-514.el7.x86_64
- [3] 升级步骤 - 在线安装
# 升级CentOS7.X内核并且启用ELRepo仓库
# RedHat只允许使用yum升级内核,CentOS允许使用ELRepo第三方仓库升级内核
$ rpm --import https://www.elrepo.org/RPM-GPG-KEY-elrepo.org
$ rpm -Uvh http://www.elrepo.org/elrepo-release-7.0-2.el7.elrepo.noarch.rpm

# 安装最新的主线稳定内核
$ yum --enablerepo=elrepo-kernel install kernel-ml

# 设置GRUB默认的内核版本
# 修改含义: GRUB初始化页面的第一个内核将作为默认内核
$ vi /etc/default/grub
> GRUB_DEFAULT=0

# 重新创建内核配置
$ grub2-mkconfig -o /boot/grub2/grub.cfg

# 重启机器并查看系统当前内核版本
$ uname -sr
> Linux 4.12.0-1.el7.elrepo.x86_64

# 查看系统中全部的内核RPM包(可选操作)
$ rpm -qa | grep kernel
> kernel-tools-3.10.0-514.26.2.el7.x86_64
> kernel-devel-3.10.0-514.10.2.el7.x86_64
> kernel-3.10.0-514.26.2.el7.x86_64
> kernel-3.10.0-327.el7.x86_64
> kernel-ml-4.12.0-1.el7.elrepo.x86_64
> kernel-headers-3.10.0-514.26.2.el7.x86_64
> kernel-devel-3.10.0-514.26.2.el7.x86_64
> kernel-tools-libs-3.10.0-514.26.2.el7.x86_64

# 删除旧内核的RPM包(可选操作)
$ yum remove \
    kernel-tools-3.10.0-514.26.2.el7.x86_64 \
    kernel-devel-3.10.0-514.10.2.el7.x86_64 \
    kernel-3.10.0-514.26.2.el7.x86_64 \
    kernel-3.10.0-327.el7.x86_64 \
    kernel-headers-3.10.0-514.26.2.el7.x86_64 \
    kernel-devel-3.10.0-514.26.2.el7.x86_64 \
    kernel-tools-libs-3.10.0-514.26.2.el7.x86_64

# 重启系统
$ reboot
- [4] 升级步骤 - 离线安装
# 无法上网的服务器或者需要安装指定版本内核的需求
# 我们可以把对应kernel的image的rpm包下载下来安装
官方CentOS6地址: http://elrepo.org/linux/kernel/el6/x86_64/RPMS/
官方CentOS7地址: http://elrepo.org/linux/kernel/el7/x86_64/RPMS/

# 当然配置了ELRepo仓库之后也是可以下载离线安装包的
$ yum install -y yum-plugin-downloadonly
$ yum install --downloadonly --downloaddir=./ kernel-ml

# 将rpm包下载上传到服务器上并使用下面的命令安装即可
$ yum -y install kernel-ml-4.12.4-1.el7.elrepo.x86_64.rpm
$ yum -y install kernel-ml-devel-4.12.4-1.el7.elrepo.x86_64.rpm
6. pip 工具的相关问题汇总
汇总日常使用 pip 工具的常见错误和对应处理方法!
- [1: 问题] 在使用新版的
pip工具(在21+的版本之后)安装某些库的时候,由于依赖库版本的不一致,pip会不断尝试和、以此安装已经存在的各个版本,来确实是否符合要求,且安装期间不会抛出错误。这就导致,如果是CI工具触发的话,短时间之内并不会停止(一个小时后自动被工具终止),导致问题不易排出且浪费机器性能。
# 循环安装
$ pip install tensorflow
- [1: 答案] 可以在手动处理的时候,加上如下参数,就可以在安装之后,迅速抛出异常。这样我们就可以根据抛出的异常冲突版本,来修改
requirements.txt文件,最后解决该问题。
# --use-deprecated=legacy-resolver
$ pip3 install -r ./requirements.txt --upgrade --use-deprecated=legacy-resolver
- [2: 问题] 安装
psycopg2依赖包的时候,提示如下问题:
# 报错信息
$ pip3 install psycopg2==2.8.4
creating pip-egg-info\psycopg2.egg-info
writing pip-egg-info\psycopg2.egg-info PKG-INFO
writing top-level names to pip-egg-info psycopg2.egg-info top_level.txt
writing dependency_links to pip-egg-info psycopg2.egg-info dependency_links.txt
writing manifest file 'pip-egg-info\psycopg2.egg-info\SOURCES.txt'
warning: manifest_maker: standard file '-c' not found
Error: pg_config executable not found.

Please add the directory containing pg_config to the PATH
or specify the full executable path with the option:
    python setup.py build_ext --pg-config /path/to/pg_config build ...

or with the pg_config option in 'setup.cfg'.
----------------------------------------
Command python setup.py egg_info failed with error code 1
- [2: 答案] 后来在这个
StackOverflow才知道了问题的原因,原来是系统少一个依赖包,导致的。
# 前提条件
$ sudo apt install postgresql-client

# Ubuntu - Python3
$ sudo apt install libpq-dev python3-dev

# Ubuntu - Python2
$ sudo apt install libpq-dev python-dev
$ sudo apt install build-essential


