带你打开 GitHub 之门的全新方式
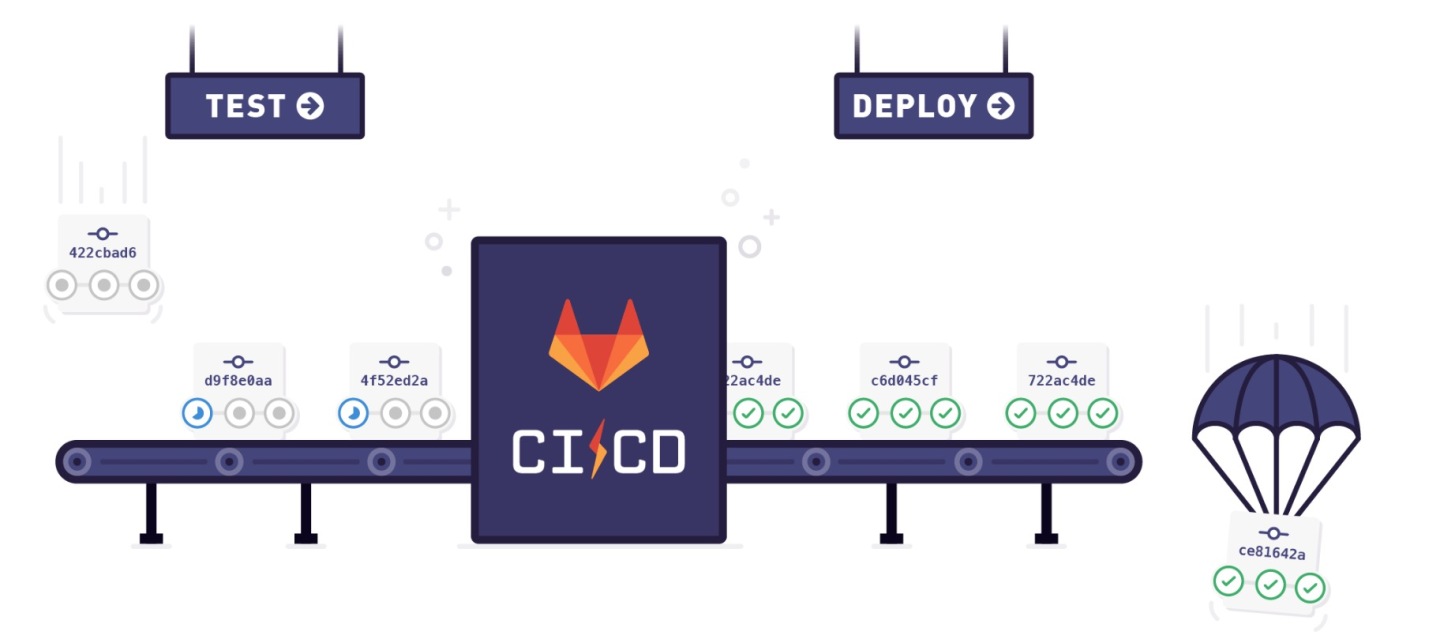
2019 年 11 月,GitHub 正式开放了 GitHub Actions 这个功能,现在不用申请就能使用。GitHub Actions 是 GitHub 官方推出的持续集成/部署模块服务(CI/CD),和 jenkins、Travis CI 是同一类产品定位,但是却有很多不同。

1. 工具介绍
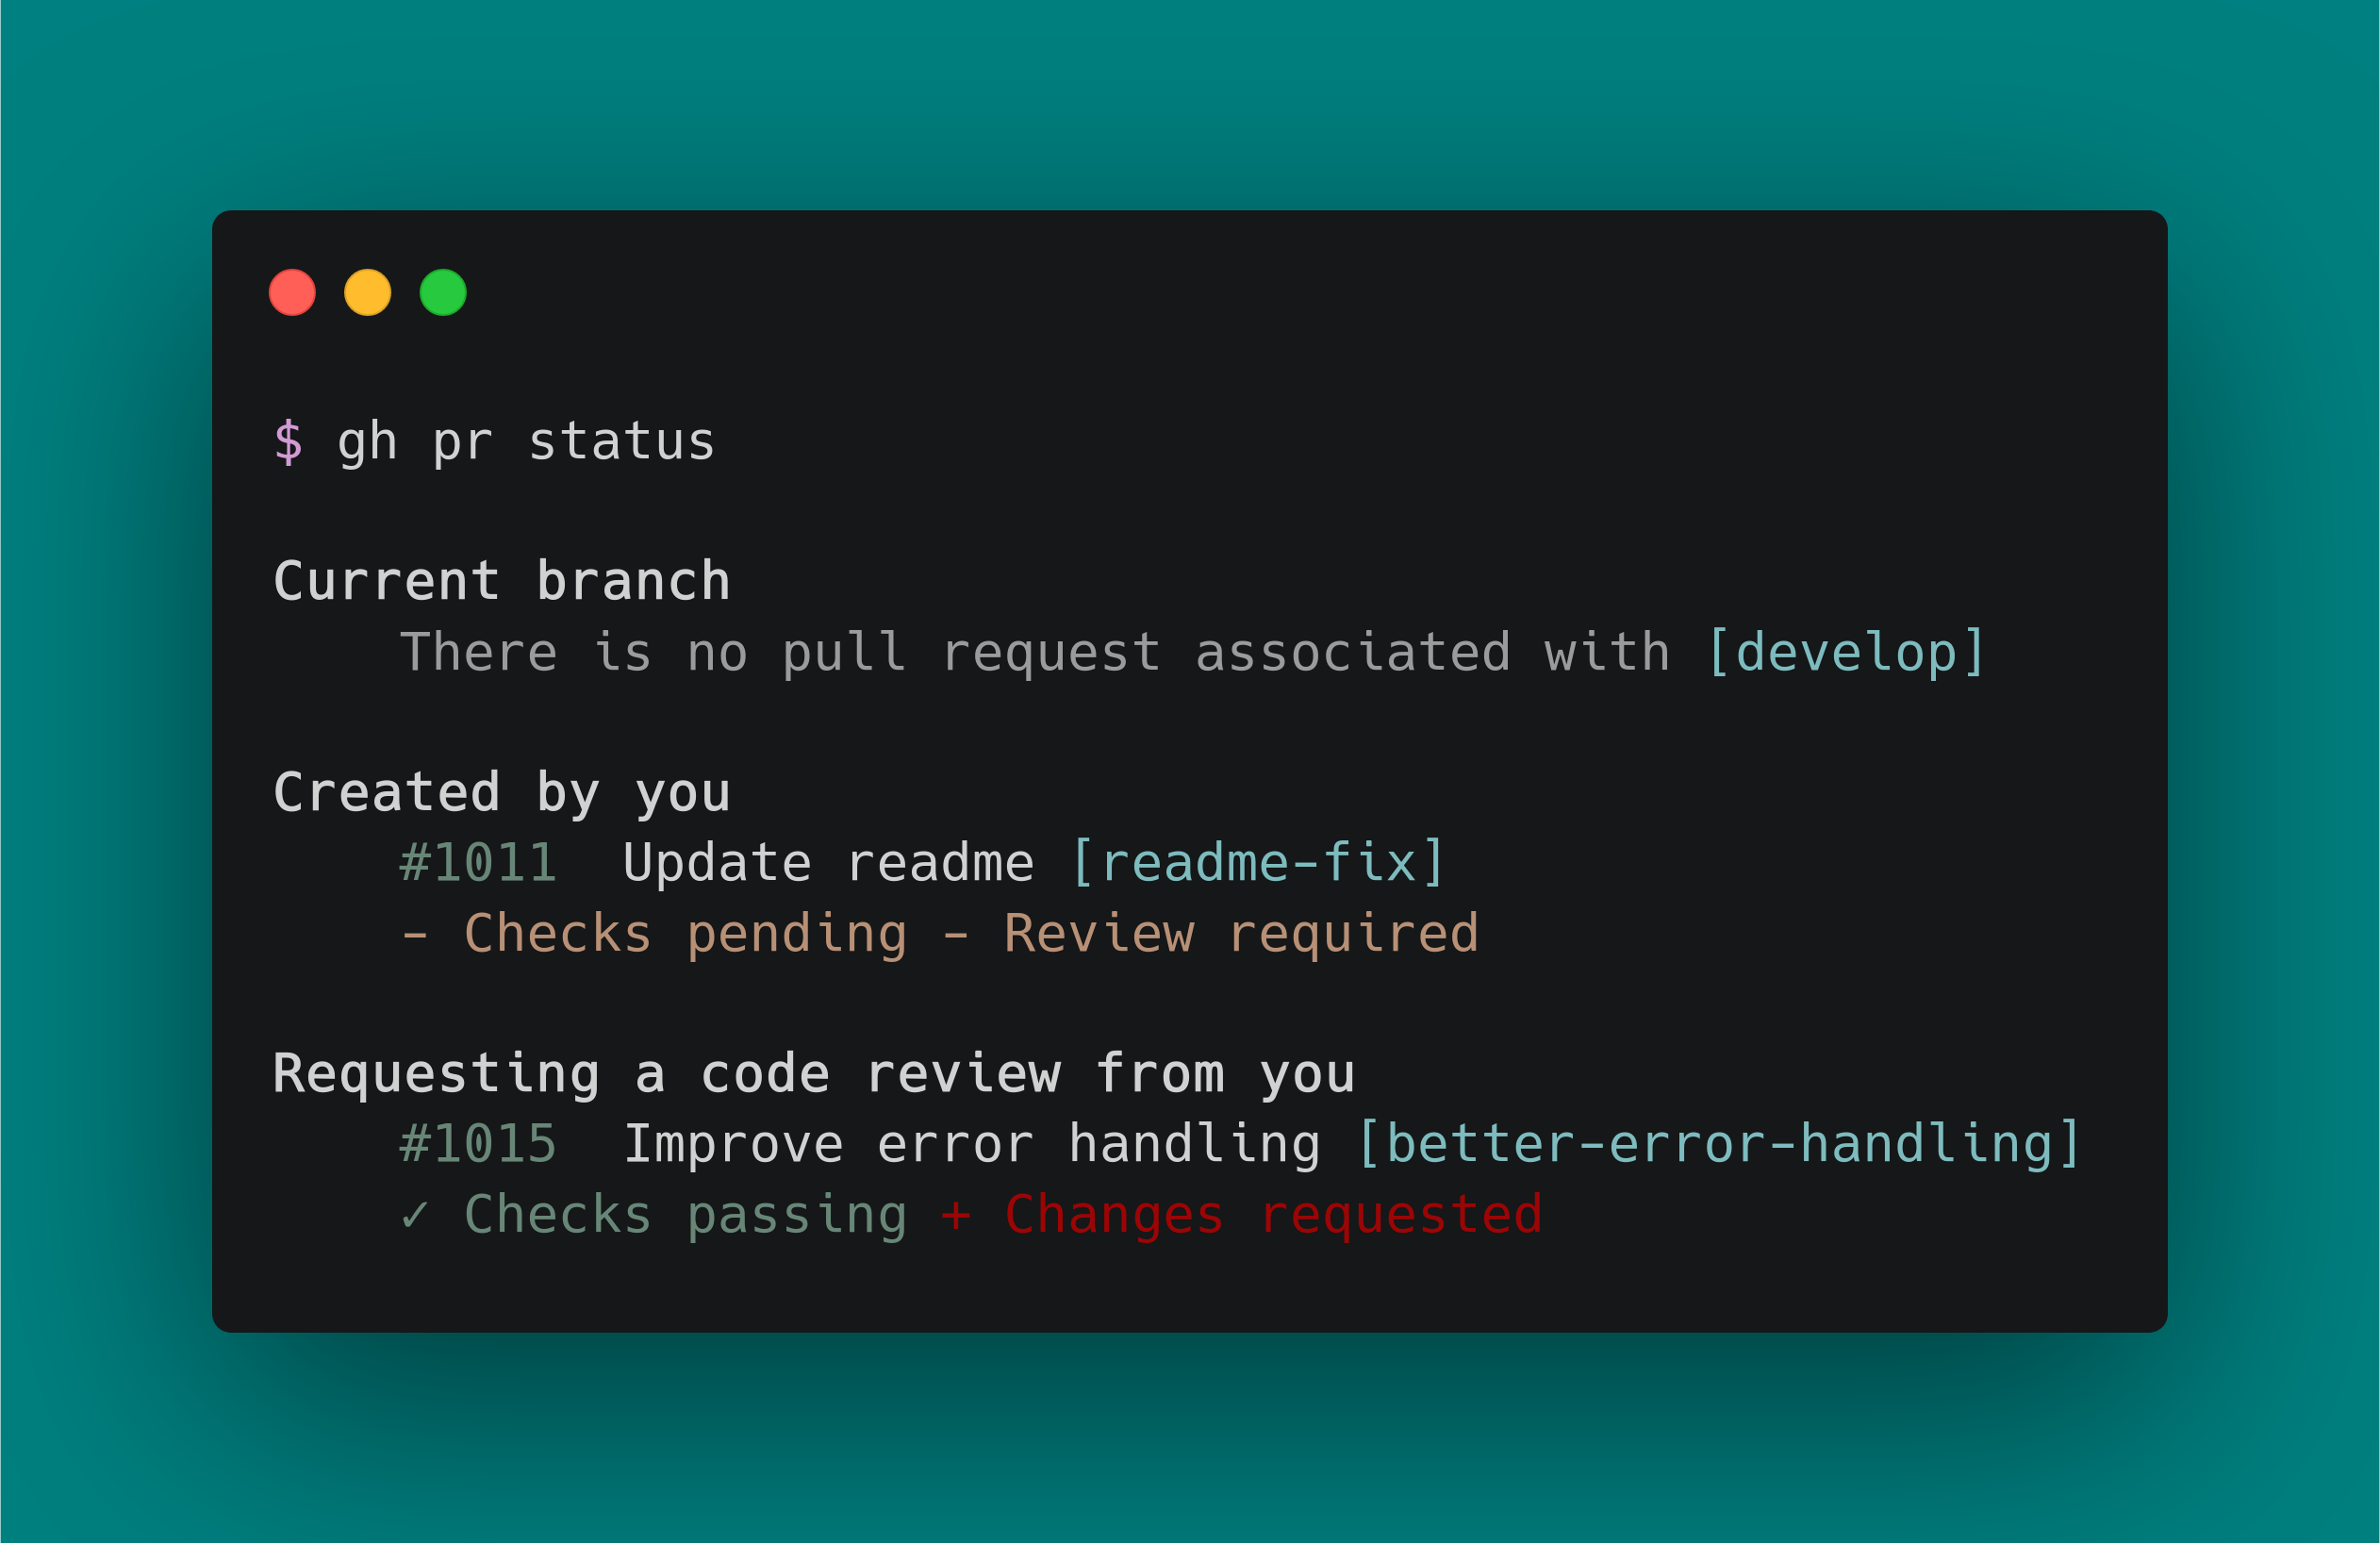
官方推出的新一代 GitHub 命令行操作工具
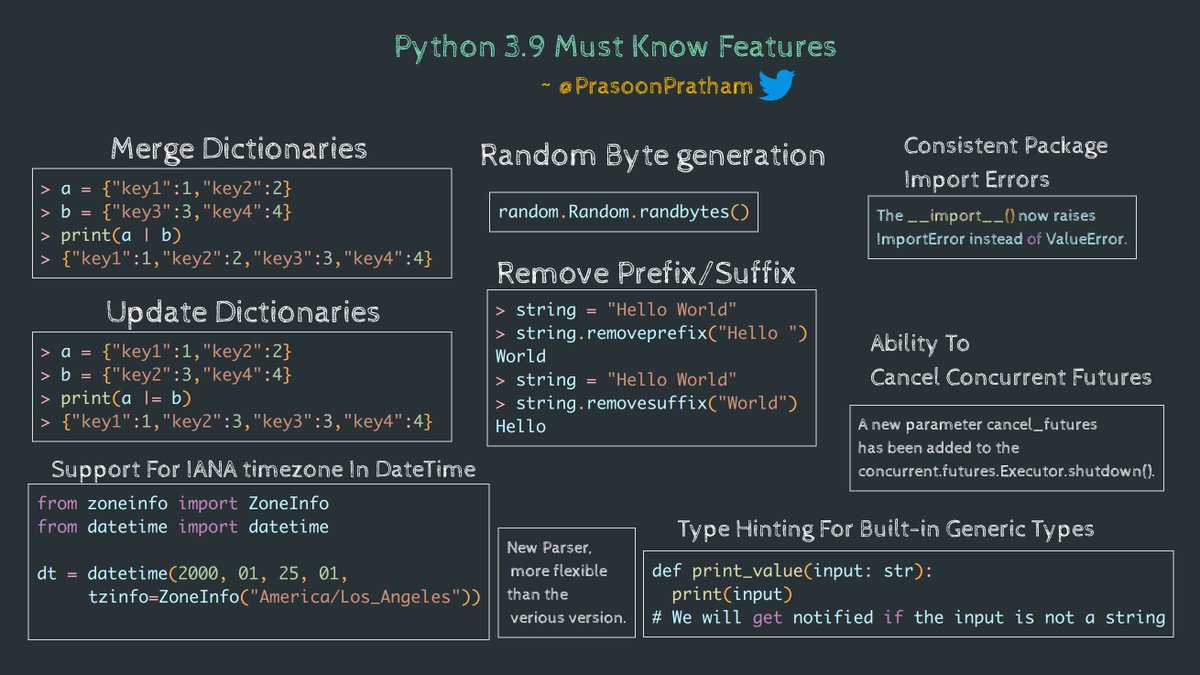
自从微软收购了 Github 之后,相继推出了挺多的新功能和新特性,我自己使用一些,总的来说还是很不多的,大部分都很适用而且学习成本比较低、很容易上手和使用。
- GitHub CLI
- Take GitHub to the command line
- 官方推出的新一代
GitHub命令行操作工具
- GitHub Actions
- Automate from code to cloud
- 一个轻量级的自动化
CI/CD工具
- GitHub Apps
- More ways to work with GitHub
- 一个多终端操作
GitHub的手机软件
- GitHub Packages
- Your packages at home with their code
- 一个包托管服务,允许开发者在上面托管包和代码,类似
npm、docker等
我们使用 GitHub Actions 最大优势就是其与 GitHub 高度结合和整合,我们只需编辑一个配置文件,即可自动开启对应功能的服务,甚至不需要购买服务器。而且,GitHub Actions 也是可以复用的,即别人写的配置文件我们也可以拿来直接使用,达到相同的功能。
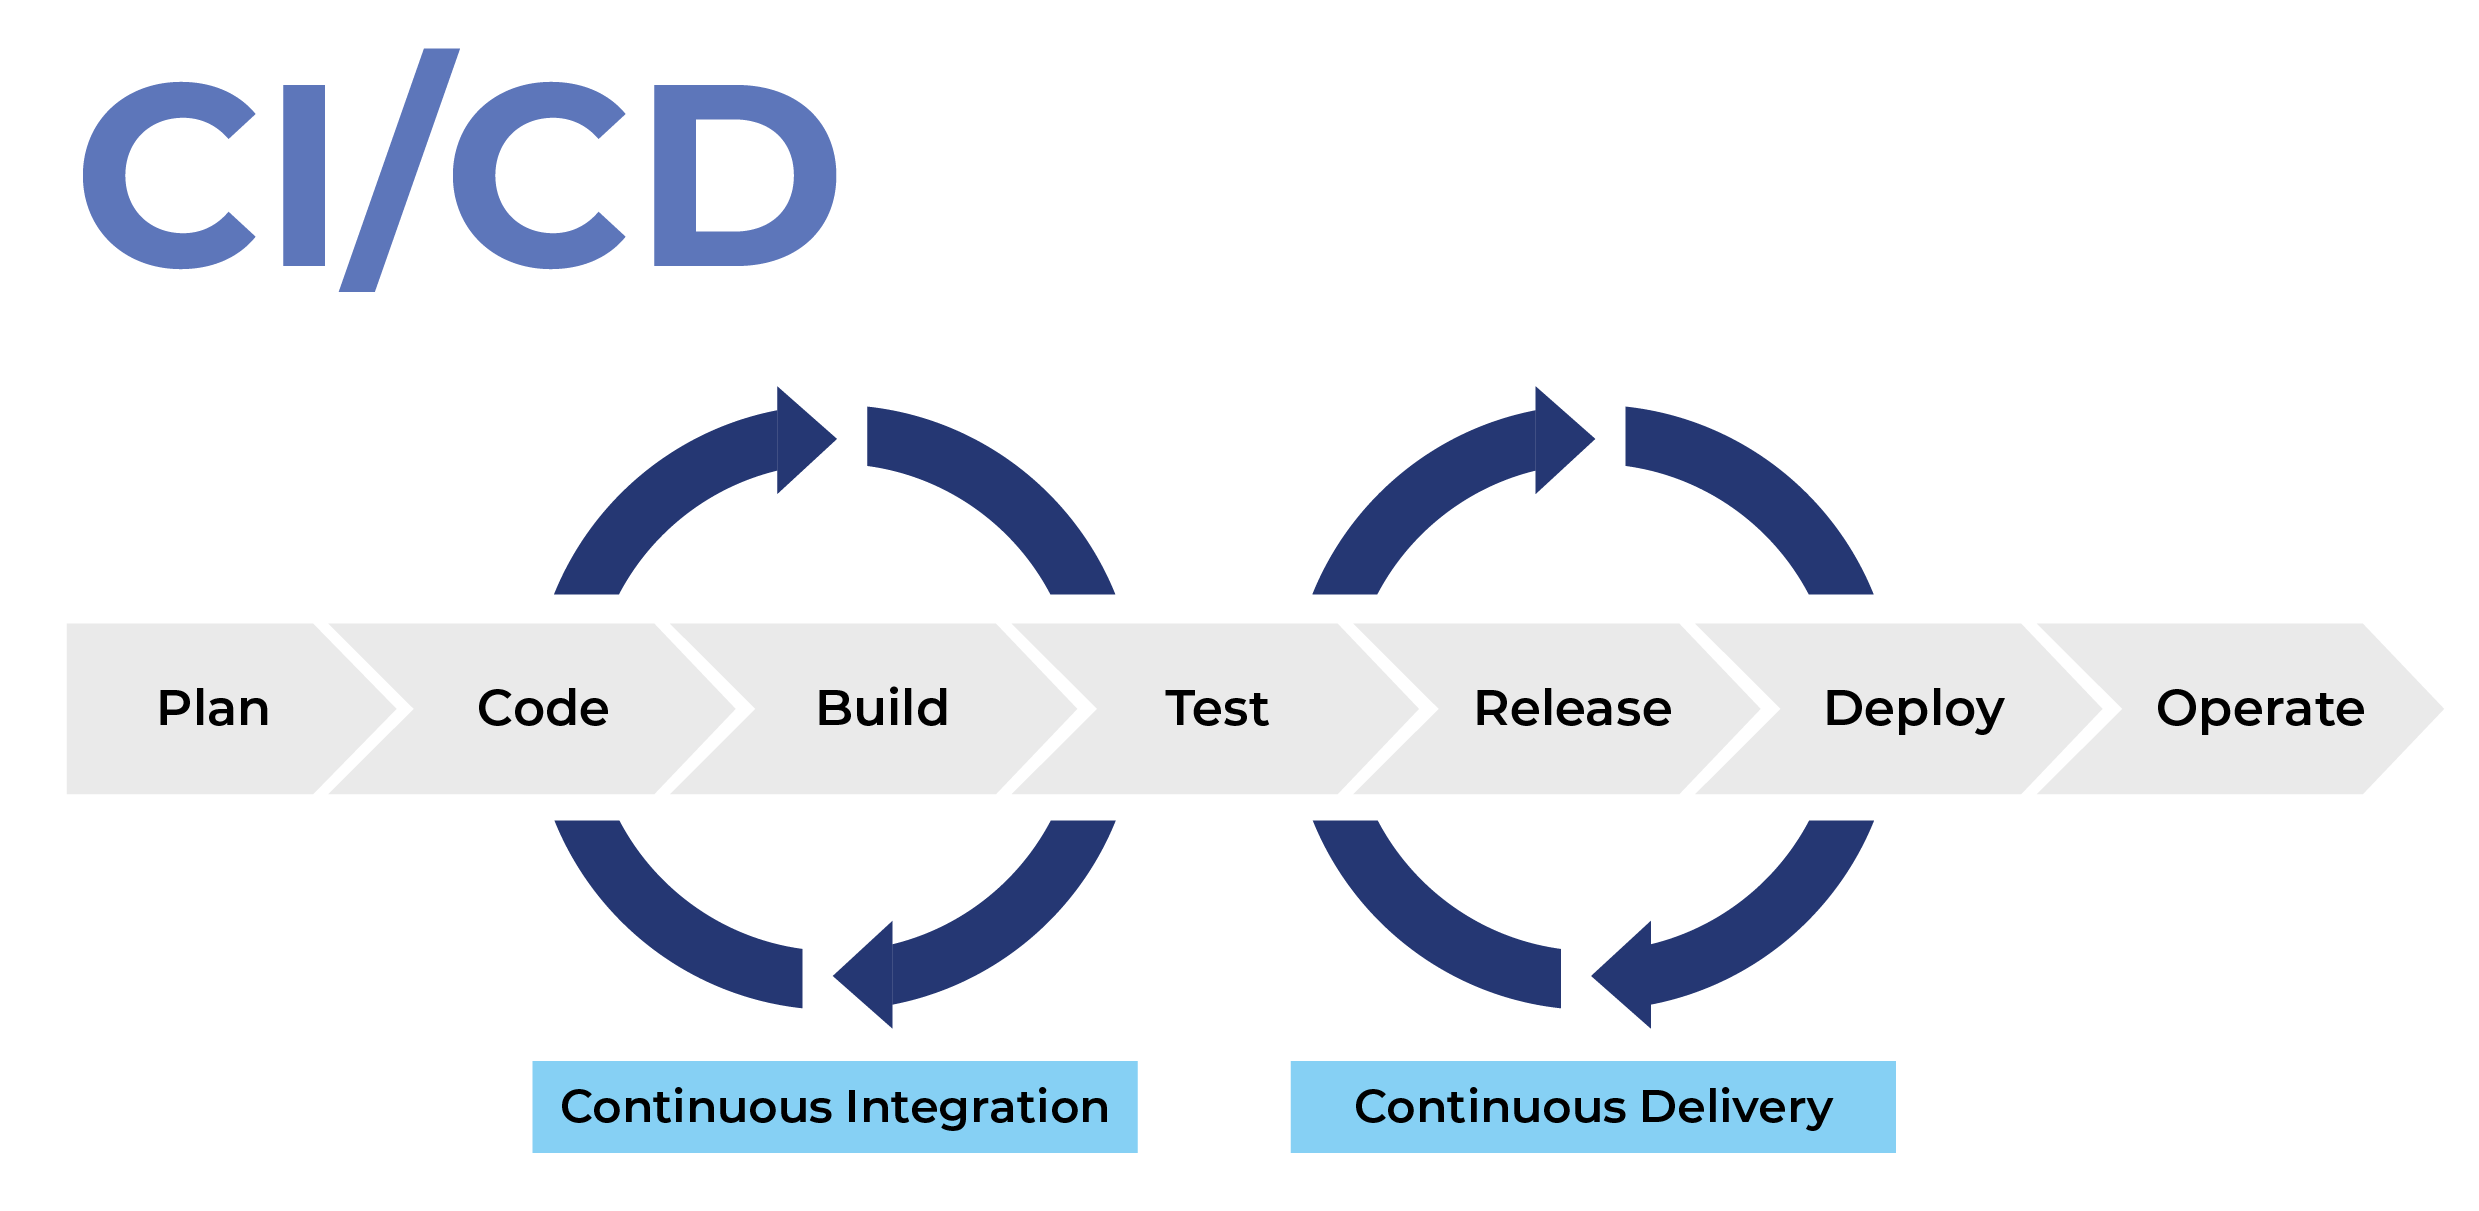
- 持续集成 - Continuous Integration
- 持续集成指的是频繁地将代码集成到主干
- 好处在于快速发现错误和防止分支大幅偏离主干
- 持续集成的目的,就是让产品可以快速迭代,同时还能保持高质量
- 持续交付 - Continuous Delivery
- 持续交付是指频繁地将软件的新版本,交付给质量团队或者用户,以供评审
- 持续部署 - Continuous Deployment
- 持续部署是指的是代码通过评审以后,自动部署到生产环境
- 持续部署的目标是,代码在任何时刻都是可部署的,可以进入生产阶段
2. 基本概念
GitHub Actions 有一些自己的术语,所以使用之前我们需要了解到 => 官方文档
- [1] workflow - 工作流程
GitHub Actions 的配置文件叫做 workflow。我们编辑完成之后,需要存放到代码仓库的 .github/workflows 目录才可以起作用,同时一个库可以拥有多个 workflow 配置文件。workflow 配置文件采用 YAML 格式,文件名可以任意取,但是后缀名统一为 .yml。
- [2] job - 任务
一个 workflow 由一个或多个 jobs 构成,含义是一次持续集成的运行,可以完成多个任务。
- [3] step - 步骤
每个 job 由多个 step 构成,一步步完成。
- [4] action - 动作
每个 step 可以依次执行一个或多个命令 action。
workflow文件的配置字段非常多,下面是一些基本字段。
| 编号 | 配置文件字段 | 对应内容 |
|---|---|---|
| 1 | name |
设置 workflow 的名称;省略该字段默认为文件名称 |
| 2 | on |
触发 workflow 的条件;通常是触发某些事件生效 |
| 3 | jobs.<job_id>.name |
要执行的一项或多项任务;workflow 文件才是核心 |
| 4 | jobs.<job_id>.needs |
指定当前任务的依赖关系;即按照预先设置顺序运行 |
| 5 | jobs.<job_id>.runs-on |
指定运行所需要的虚拟机环境;目前包含多种虚拟机 |
| 6 | jobs.<job_id>.steps |
指定每个 Job 的运行步骤;可以包含一个或多个步骤 |
| 7 | jobs.<job_id>.env |
设置整个 Job 的所有步骤都可以使用的环境变量 |
| 8 | jobs.<job_id>.steps.env |
设置在 Job 的执行某个步骤才可以使用的环境变量 |
| 9 | jobs.<job_id>.steps.run |
在操作系统的 shell 中运行一条或者多条命令 |
| 10 | jobs.<job_id>.steps.with |
定义 step 在执行时需要输入的参数名称和对应值 |
# on
on: push
on: [push, pull_request]
on:
  push:
    branches:
      - master
# jobs.<job_id>.name
jobs:
  my_first_job:
    name: My first job
  my_second_job:
    name: My second job

# jobs.<job_id>.needs
jobs:
  job1:
  job2:
    needs: job1
  job3:
    needs: [job1, job2]

# jobs.<job_id>.runs-on
runs-on: ubuntu-18.04
runs-on: windows-2019
runs-on: macOS-latest

# jobs.<job_id>.steps
jobs.<job_id>.steps.name:步骤名称
jobs.<job_id>.steps.run:该步骤运行的命令或者action
jobs.<job_id>.steps.env:该步骤所需的环境变量

# jobs.<job_id>.steps.run
- name: Clean temp directory
  run: rm -rf *
  shell: bash
  working-directory: ./temp

# jobs.<job_id>.steps.run
- name: Clean install dependencies and build
  run: |
    npm ci
    npm run build
# jobs.<job_id>.steps.with
jobs:
  my_first_job:
    steps:
      - name: My first step
        uses: actions/hello_world@main
        with:
          first_name: Mona
          middle_name: The
          last_name: Octocat

# jobs.<job_id>.steps.with.entrypoint
steps:
  - name: Run a custom command
    uses: monacorp/action-name@main
    with:
      entrypoint: /a/different/executable
- 下面是一个完整的
workflow文件的范例。
# 打印设置的四个变量
name: Greeting from Mona

on: push

jobs:
  my-job:
    name: My Job
    runs-on: ubuntu-latest
    steps:
      - name: Print a greeting
        env:
          MY_VAR: Hi there! My name is
          FIRST_NAME: Mona
          MIDDLE_NAME: The
          LAST_NAME: Octocat
        run: |
          echo $MY_VAR $FIRST_NAME $MIDDLE_NAME $LAST_NAME.
workflow文件的配置字段非常多,下面是容器构建相关的字段。
| 编号 | 配置文件字段 | 对应内容 |
|---|---|---|
| 1 | jobs.<job_id>.container.image |
设置 Job 需要运行的容器镜像名称 |
| 2 | jobs.<job_id>.container.credentials |
设置登录容器镜像仓库的用户名和密码 |
| 3 | jobs.<job_id>.container.env |
设置容器相关的环境变量 |
| 4 | jobs.<job_id>.container.ports |
设置要在容器上公开的端口数组 |
| 5 | jobs.<job_id>.container.volumes |
设置容器要使用的卷数组 |
# container
jobs:
  my_job:
    container:
      image: node:10.16-jessie
      env:
        NODE_ENV: development
      ports:
        - 80
      volumes:
        - my_docker_volume:/volume_mount
      options: --cpus 1
# credentials
container:
  image: ghcr.io/owner/image
  credentials:
    username: ${{ github.actor }}
    password: ${{ secrets.ghcr_token }}

# volumes
volumes:
  - my_docker_volume:/volume_mount
  - /data/my_data
  - /source/directory:/destination/directory

# services
services:
  myservice1:
    image: ghcr.io/owner/myservice1
    credentials:
      username: ${{ github.actor }}
      password: ${{ secrets.ghcr_token }}
  myservice2:
    image: dockerhub_org/myservice2
    credentials:
      username: ${{ secrets.DOCKER_USER }}
      password: ${{ secrets.DOCKER_PASSWORD }}
3. 简单使用
站在巨人的肩上,我们可以创造更多东西!
另外 GitHub 做了一个官方市场,可以搜索到他人提交的 actions。另外,还有一个 awesome actions 的仓库,也可以找到不少 action,比如发送邮件、发送天气、库编译等。每个 action 就是一个独立脚本,因此可以做成代码仓库,使用 userName/repoName 的语法引用 action。比如,actions/setup-node 就表示 github.com/actions/setup-node 这个仓库,它代表一个 action,作用是安装 Node.js。事实上,GitHub 官方的 actions 都放在 github.com/actions 里面。
- [1]
ansible-lint- This action allows you to run ansible-lint with no additional options.
# .github/workflows/ansible-lint.yml
# https://github.com/marketplace/actions/ansible-lint
name: Ansible Lint
on: [push, pull_request]

jobs:
  build:
    runs-on: ubuntu-latest
    steps:
      - uses: actions/checkout@v2
      - name: Lint Ansible Playbook
        uses: ansible/ansible-lint-action@master
        with:
          targets: ""
          override-deps: |
            ansible==2.9
            ansible-lint==4.2.0
          args: ""
- [2]
Create a Release- This GitHub Action wraps the GitHub Release API.
# .github/workflows/create-a-release.yml
# https://github.com/marketplace/actions/create-a-release
name: Create Release
on:
  push:
    tags:
      - "v*"

jobs:
  build:
    name: Create Release
    runs-on: ubuntu-latest
    steps:
      - name: Checkout code
        uses: actions/checkout@v2
      - name: Create Release
        id: create_release
        uses: actions/create-release@v1
        env:
          GITHUB_TOKEN: ${{ secrets.GITHUB_TOKEN }} # This token is provided by Actions, you do not need to create your own token
        with:
          tag_name: ${{ github.ref }}
          release_name: Release ${{ github.ref }}
          body: |
            Changes in this Release
            - First Change
            - Second Change
          draft: false
          prerelease: false
- [3]
Setup Python- This action sets up a Python environment for use in actions
# .github/workflows/setup-python.yml
# https://github.com/marketplace/actions/setup-python
name: Setup Python
on: push

jobs:
  build:
    runs-on: ubuntu-latest
    strategy:
      matrix:
        python-version: ["2.x", "3.x"]
    name: Python ${{ matrix.python-version }} sample
    steps:
      - uses: actions/checkout@v2
      - uses: actions/setup-python@v2
        with:
          python-version: "3.x"
          architecture: "x64"
      - run: python my_script.py
- [4]
Python Poetry Action- GitHub Actions for Python projects using poetry
# .github/workflows/python-poetry-action.yml
# https://github.com/marketplace/actions/python-poetry-action
name: Python Poetry Action
on: pull_request

jobs:
  ci:
    strategy:
      fail-fast: false
      matrix:
        python-version: [3.6, 3.7, 3.8]
        poetry-version: [1.0, 1.1.2]
        os: [ubuntu-18.04, macos-latest, windows-latest]
    runs-on: ${{ matrix.os }}
    steps:
      - uses: actions/checkout@v2
      - uses: actions/setup-python@v2
        with:
          python-version: ${{ matrix.python-version }}
      - name: Run image
        uses: abatilo/actions-[email protected]
        with:
          poetry-version: ${{ matrix.poetry-version }}
      - name: View poetry --help
        run: poetry --help
4. 示例演示
主要介绍几种简单的玩法!
- [1] 自动部署 React 项目到 GitHub
# 将构建结果发送到GitHub仓库的话需要使用GitHub密钥
# https://help.github.com/en/articles/creating-a-personal-access-token-for-the-command-line

# 1.程序运行在ubuntu-latest的虚拟机上
# 2.使用官方action的actions/checkout来获取源码
# 3.使用的JamesIves/github-pages-deploy-action来完成构建和部署

name: GitHub Actions Build and Deploy Demo
on:
  push:
    branches:
      - master

jobs:
  build-and-deploy:
    runs-on: ubuntu-latest

    steps:
      - name: Checkout
        uses: actions/checkout@master

      - name: Build and Deploy
        uses: JamesIves/github-pages-deploy-action@master
        env:
          ACCESS_TOKEN: ${{ secrets.ACCESS_TOKEN }}
          BRANCH: master
          FOLDER: build
          BUILD_SCRIPT: npm install && npm run build
- [2] 使用 GitHub Actions 实现博客自动化部署
# 只在master上push触发部署
# 下列README.md和LICENSE文件的变更不触发部署

name: Deploy site files
on:
  push:
    branches:
      - master
    paths-ignore:
      - README.md
      - LICENSE

jobs:
  deploy:
    runs-on: ubuntu-latest

    steps:
      - name: Download
        uses: actions/checkout@v2

      - name: Deploy to Server
        uses: AEnterprise/rsync-[email protected]
        env:
          DEPLOY_KEY: ${{ secrets.DEPLOY_KEY }}
          ARGS: -avz --delete --exclude='*.pyc'
          SERVER_PORT: "22"
          FOLDER: ./
          SERVER_IP: ${{ secrets.SSH_HOST }}
          USERNAME: ${{ secrets.SSH_USERNAME }}
          SERVER_DESTINATION: /home/escape/mysite/

      - name: Restart server
        uses: appleboy/ssh-action@master
        with:
          host: ${{ secrets.SSH_HOST }}
          username: ${{ secrets.SSH_USERNAME }}
          key: ${{ secrets.DEPLOY_KEY }}
          script: |
            cd /home/fming/mysite/
            python manage.py migrate
            supervisorctl restart web
- [3] 定时发送天气邮件
name: "GitHub Actions Weather Bot"

on:
  push:
  schedule:
    - cron: "0 21 * * *"

jobs:
  bot:
    runs-on: ubuntu-latest
    steps:
      - name: "Checkout codes"
        uses: actions/checkout@v1
      - name: "Get Weather"
        env:
          CITY=Beijing
          LANGUAGE="zh-CN"
          UNIT=m
          UA="Mozilla/5.0 (Windows NT 10.0; Win64; x64) AppleWebKit/537.36 (KHTML, like Gecko) Chrome/79.0.3945.88 Safari/537.36"
        run:
          curl -H "Accept-Language: $LANGUAGE" -H "User-Agent: $UA" -o result.html wttr.in/$CITY?format=4\&$UNIT
      - name: "Get Date"
        run: echo "::set-env name=REPORT_DATE::$(TZ=':Asia/Beijing' date '+%Y-%m-%d %T')"
      - name: "Send mail"
        uses: dawidd6/action-send-mail@master
        with:
          server_address: smtp.163.com
          server_port: 465
          username: ${{ secrets.MAIL_USERNAME }}
          password: ${{ secrets.MAIL_PASSWORD }}
          subject: Beijing Weather Report (${{env.REPORT_DATE}})
          body: file://result.html
          to: [email protected]
          from: GitHub Actions
          content_type: text/html
5. 参考文章
送人玫瑰,手有余香!